Sunday, December 2, 2012

Sourdough Adventures - Whole Wheat Sourdough Pancakes with Dates Syrup


2 years ago

AJ was mesmerized by the stream of people carrying bowls seemingly made of  bread and filled with some steaming hot liquid at Fisherman's Pier. Hot soup seemed like a great idea on a cold, wet day. Trying hard to not to be obvious, she began searching for the 'source' of those bread bowls. She found herself at the display of Boudin Bakery  in San Francisco, completely taken by the different shapes the bread (think - alligators, tortoises, bears!). AJ soon discovered she was unwittingly standing at the door of Boudin Bakery - the birth place for San Francisco sourdough. It had an unusual tangy taste from the fermentation of wheat. AJ was hooked. 

Fast forward to 1 week ago

AJ willed herself to complete the conference review despite this being among the top five boring things in the world to do. 15 more minutes and then you can go exploring the internet, she told herself. 

15 minutes later...

 Meandering through the daily news, AJ accidently clicked on a website and it opened a page on sourdough. Intrigued, AJ began browsing through. After getting home, she started her research. Before she knew it, it was already 1:00 am before she decided to go to sleep.

5 days ago...

After much research and postponing, AJ decided to take the plunge and initiate the sourdough starter.

5 days. That's exactly how many days it took for these pancakes to be made. I did goof up and didn't follow instructions, but warm weather makes it easy to correct mistakes and contributed to the 5 days. Stay tuned for my next post for the actual sourdough starter recipe.

Let me explain how I ended up with sourdough pancakes. Sourdough starter process requires half of the starter to be discarded every 12 hours. I didn't realize how quickly it all added up which sent me flying to my laptop for recipes. The pancakes came at a convenient time - it was breakfast time on a lazy vacation day.

And I made a happy accidental discovery. Dates Syrup. It totally works. A very good replacement for the super expensive maple syrup. It has a rich, deep flavor which works very well with the tangy sourdough.

So, without much ado, let me present the recipe for sourdough.


Sourdough Pancakes with Dates Syrup

Adapted from WildYeast
Makes about 6 pancakes

Ingredients
1 cup mature 100%-hydration sourdough starter
1/4 cup milk
1 tbsp sugar
2 tbsp vegetable oil
1 egg
1/2 tsp salt
1&1/2 tsp baking soda

Directions 

Heat non-stick girdle/tawa on a medium-high flame. Melt butter.

Whisk all ingredients till well mixed. Pour 2 tbsp of batter on the griddle and cook on one till bubbles appear.  Flip and cook till well browned. 

Serve with generous amounts of dates syrup.

Sunday, August 5, 2012

Coconut Oats Muffins

I am on a muffin making spree. It's the perfect dessert and I wish I had discovered them sooner. I love their size; it is the perfect serving size for 1 person. Its completely another matter than I can't just stop eating them!  Perhaps that's why I waited so long before dabbling in baking. It was pure self preservation. Oh well, you can't stop things which are meant to be. 


I think it also had to with her beautiful blog. Joy makes baking so irresistible and simple. A lot of blogs make baking sound tedious; careful measurements and taking temperatures. Not Joy. With her, its just a matter of mixing, beating and popping in the hot oven and voila! 

I am also totally loving my convection microwave. It takes much lesser time to heat up and get cracking. Baking times are shorter too. So unlike the monstrosity that came fitted with the apartment in Seattle.

I never experimented with coconut flakes or coconut oil till now and this recipe seemed like just the thing to get started. Mine actually puffed up as you can see in the photographs. Maybe because I used quick cooking oat meal rather than traditional oats. I also made a batch with mangoes, but I much preferred the ones without mangoes. Mangoes tend to get super mushy when baked and don't keep well till the next day.

Coconut Oats Muffins
Adapted from The Kitchn.
Makes about 12 muffins

Ingredients
1/2 cup coconut oil (I used Parachute cooking oil)
3/4 cup all-purpose flour
3/4 cup oat flour (I processed the quick cooking oats into the flour)
1/2 cup oats (I used quick cooking oats since that's the only one available here)
1 1/2 teaspoons baking powder
1/4 teaspoon salt
1/2 cup fresh coconut - grated
1 cup yogurt - I used home made
1/3 cup granulated sugar + 2 tbsp sugar for sweetened coconut
1 large egg, room temperature 
Vanilla essence - 3-4 drops
1/4 cup sweetened shredded coconut, for top

Directions


For making sweetened coconut, add 1-2 tbsp coconut water and 2 tbsp sugar to grated coconut. Microwave on high in 30 second bursts till the sugar melts, taking care the coconut or sugar doesn't burn.


Preheat the oven to 150 degree Celsius.

Sift together all the dry ingredients. Add coconut flakes to the dry ingredients. 


In a separate bowl, stir together all the wet ingredients along with the egg till mixed well. Add the wet ingredients to the dry ingredients and mix till well combined.

Line cupcake pan with cupcake wrappers. Pour batter into the cupcake wrappers till the top and top it with sweetened coconut. Bake for 20 - 30 minutes till the toothpick comes out clean. 

Saturday, June 23, 2012

Boiled Custard With Ripe Mangoes

Evolution of recipes is a fascinating thing. Recipe follow people and mingle with other recipes resulting in delightful consequences. Check any pastry shop in India and you would find a medley of products that are reminiscent of the bygone British era. Some recipes have even become extinct elsewhere but still continue with strong patronage here. Cream horns for instance. This article in Sunday's livemint tells tales of delicacies made out of pastry filled fresh cream and jam which were once popularized by the British in India. You can still find these in local pastry and bakery shops across India. I suspect pineapple pastry and black forest cake also belong to the same genre. Another dinosaur, the boiled custard, captured the imagination of Indians like no other. You can still find the yellow boxes of Brown and Polson vegetarian custard mix boxes which claim to be vegetarian custard are little more than yellow coloring, cornflour and vanilla essence in every grocery store.

Custard reminds me of summer vacations at my grandmother's. The yellow custord and the jiggling red rasperry jelly captured 5 year old me's imagination much like my ancestors. And if I was really good, I would get a mango pieces with it.

I didn't want the out-of-a-yellow-box version to satisfy today's craving. After hunting around a little, I came across one in The Kitchn. On one of these rare instances, I followed the recipe verbatim. I can now understand why people prefer the from-scratch version. The box version does not do it justice at all!

While the recipe was good, I would probably cut the sugar in half the next time to suit my tastes. I prefer custard to be vehicles of other goodies and not an end in itself.

I took some really bad pics this time. Will try to get some next time! Promise.

Vegetarian Chocolate Muffins

Some days are bad. Then there are days which only chocolate muffins and Adele can salvage. And on some days, those chocolate muffins are also dinner. Stop staring open-mouthed at me. What? I am just human. I will get to that Yoga class on Monday. Promise.

Now, back to those muffins. Baking without eggs has always kind of confounded me. I have tried to tackle this monster many times but I always ended up with a flat, fudgey mess. 

But, today, the urge to make chocolate muffins was too strong. I picked up the first chocolate muffin recipe Google offered and replaced eggs with flax seed concoction. With some other alterations of course! Mostly around removing some of the items from the original recipe. 

And I was rewarded with glossy, perfect muffins. My first victory of the day! 


Only later did I take time to read the rest of this. Life works in strange, mysterious ways to soothe you when everything seems lost. :) 

Vegetarian Chocolate Muffins

Inspired by one of those days. Adapted from Orangette's cake.

Makes about 12 muffins


Ingredients
1/2 cup hot brewed coffee
1 cup powdered sugar

1 & 1/2 cups all-purpose flour
1/2 cups unsweetened cocoa powder (I used low fat)
2 tsp baking powder
1/4 tsp salt
3 tsp ground flaxseed mixed with 8 tbsp warm water
1/2 cup sunflower oil (Can be reduced to 1/3. I added extra to make up for egg yolks)
1/2 cup well-shaken buttermilk


Directions
Sift together all the dry ingredients. Slowly add the liquids while making sure no lumps are formed.

Preheat the oven to 150 degree Celsius. Grease and dust the cupcake pan with flour. Pour batter into the cupcake till the top. Bake for 20 - 30 minutes till the toothpick comes out clean.


Make sure the pans are cooled somewhat before removing the muffins. Try to remove them when they are semi-warm, otherwise the bottoms tend to get soggy because of condensed moisture. You can also use cute muffin wrappers. That should help with the sogginess.

Monday, January 24, 2011

Homemade Muesli Healthy Heart Recipe

Homemade Muesli

I have been on a health buzz ever since certain physical exam results came in. And my pancake breakfast streak finally came to an end. Enter yogurt and muesli.

Except that I didn't find the perfect ready-made muesli blend. Which was a total shocker, as we got muesli blends in India by the kilos! We tried several brands. Some were too sweet, too bland or just too many raisins (Yes, there is such a thing, especially if you don't possess a sweet tooth!). And no, I wasn't going to go the granola way. It just has too much oil and sugar for being healthy for me. It didn't help that Mr. AJ and me had wildly different preferences when it came to muesli. So, I decided to make my own.

This is my recipe of muesli. I have added certain unusual elements to amp up the nutrients. Flaxseeds provide the omega-3, which is tough to get on a vegetarian diet. This offers a healthy, non-supplement route to incorporate some in our daily diet. Instead of raisins, I added dried blueberries and cranberries which provided the mild sweetness. I love these because they don't overpower unlike raisins. Cranberries and blueberries also have a very high antioxidants content. Pecans, sliced almonds and roasted pumpkin seeds offer the crunch. Pecans have been found to rank the highest among all nuts in terms of anti-oxidation properties and are also reduce cholesterol levels.
Homemade Muesli Recipe
Inspired by AJ's health report :)

If you have trouble finding any of the rolled cereals, substitute it with another rolled cereal.

Makes 6-8 cups

Ingredients

Rolled Wheat - 2 cups
Rolled Triticale- 2 cups
Rolled Barley- 1 cup
Rolled Oats -1 cup
Wheat Bran- 1/3 cup
Dried Cranberries- 1 cup
Dried Blackberries- 1 cup
Chopped Pecans- 1/2 cup
Sliced Almonds-1/2 cup
Pumpkin Seeds- 1 cup
Flaxseeds- 1/3 cup

Directions

Mix all the rolled cereals together to create an even mix. Add dried cranberries, blackberries, nuts and seeds together with wheat bran. Mix well to evenly distribute all ingredients. Store in an air tight container.

Thursday, January 20, 2011

Perfect Homemade Yogurt- Look, No Machines!

Have you ever experience the thrill tinged with the sense of nostalgia when you rediscover something long forgotten? Yes, of course, I am talking about food here.

I had given up on making yogurt at home after a few failed or less than perfect attempts. Maybe I had gotten lazy and stopped exploring what could have gone wrong. Homemade yogurt also known as curd or dahi is something of a necessity in daily meals. It was something I used to do effortlessly in India with perfect results. Of course, I had always taken the hot weather for granted and never given it much thought. It was a simple affair of mixing warm milk with a teaspoon of culture and forgetting about it for next couple of hours. And voila, you had homemade yogurt! 5 months ago I moved to this cold country which I now call home. You can imagine my plight when I tried to use the same methods I used to use, and failing miserably. Finally, one fine morning, I decided to get behind the science of it all. Then, yesterday, I made a breakthrough!

Turns out I was doing a couple of things wrong.

1) The Milk: Never use lactose free or fat free milk. The bacteria in the culture need lactose to digest for their food. Without lactose, they will not grow and simply die. Fat free milk takes much longer to set, and may still have a watery consistency. Bottom line, use 1%, 2% or whole milk.

2) The Heat: I didn't boil the milk like I used to in India. In India, despite the milk being pasteurized, it is a common practice to first boil it and then use it. Because of the excessive heat, even a low bacteria count increases the chances of milk spoilage. As it turns out, boiling is an important factor in making yogurt. The heat changes or renatures the protein casein in the milk, which forms the bulk of the protein content in milk. According to some sources, the high heat also denatures whey, the other protein type present in milk. This allows formation of a more stable gel. Another function of heat is to reduce or eliminate other bacteria that may be present in milk so that the bacteria in the starter culture can flourish.

3) The amount and quality of culture: Used too little of it. One teaspoon is too less in a cold climate. Look for yogurt cultures with Streptococcus thermococcus and Lactobacillus bulgaricus in it. The bacteria break down the lactose to lactic acid which lowers the pH of the milk. This causes the clotting or soft gel formation of the milk. Ideally, these should be the only two bacteria present since they help in formation of yogurt. In probiotic yogurts, other bacteria are added, which means that the others will compete with these two for growth during time of incubation. This will result in longer time for formation of yogurt.

4) Not homogenizing the culture and milk.

5) Sustained heat at least 108F (42 degree Celcius). This step is necessary to allow a robust growth of the bacteria in the starter culture. The temperature should be sustained till pH 4.5 is reached. Because of cold and low activity of bacteria in the store bought cultures, longer period of heat is needed to allow ample production of lactic acid to reduce the pH of the milk.

I read countless articles about yogurt and yet none of them really gave me the perfect results I was hoping to get. Yogurt maker was completely out of the question. I avoid uni-taskers like the plague. I like my yogurt thick, but not dense like the store bought variety. Most recipes without the yogurt maker recommended using the oven. Maybe I have a rather large oven, or maybe its too cold out here, the oven never really worked. It became cold before the yogurt set too soon. And I was not very keen on keeping it on for the duration of 4-5 hours. What a waste of electricity! Then it struck me, a hot water bath should do the trick. I tried, and voila, after 4-5 hours I had my perfect dahi. The results almost made me weep with joy. So, without further ado, I present to you the perfect yogurt recipe.

Perfect Homemade Yogurt
Inspired by Science!

I used 2% milk for the recipe. I also used culture from plain, unflavored, store bought yogurt from an Indian store. Look for any brand with active or live bacteria mentioned above. The consistency of the yogurt improves with each successive batches of yogurt, as it becomes purer. The store bought yogurt culture may contain stabilizers which affect the consistency of yogurt.

Ingredients
2 cups milk (2%)
Culture (3 tablespoons)

Directions
Bring the milk on the stove in a pan to a boil. Remove from heat as soon as milk shows signs of reaching a boiling stage. Don't over boil as sustained heat will denature the proteins and will prevent formation of a thick curd. Transfer to a container with a tight fitting lid and let it cool to 98-112 F. In India, we traditionally use a steel container called lota to make yogurt. It will take a while for it to reach that stage, so don't wait around.

If the culture is thick, mix it gently with a whisk in a bowl. Once the milk cools to 112F, add the culture and mix it gently with a whisk to distribute the culture. Close the container with a tight fitting lid.

Fill a large vessel with enough water to submerge 3/4th of the yogurt container in water. The container should be large enough so that it can easily accommodate the yogurt container. Make note that the yogurt will displace some water, so use water accordingly. We don't want the yogurt container to submerge completely. Bring the water to just boiling. Remove from heat.

Place the container with milk and culture inside the hot water gently, making sure no spillage occurs. Now place this entire assembly in a closed environment such as an oven, microwave or a small cabinet. The yogurt should set in 4-5 hours. Place it in refrigerator for at least an hour before serving.

Tuesday, January 18, 2011

Vegetable Poha

Vegetable Poha

Sometimes I awaken with a wish to relive the those carefree yesteryears of my childhood. It is the small things that have the power to transport us to the past. For me, the journey to the past always has some element of food attached to it. So on this rainy day, I rummaged through my kitchen cupboard for something comforting to remind me of home. And there it was! A forgotten, half used packet of poha. I peered through my refrigerator to dig out vegetables that needed to be used fast. And I came up with this.

Poha (pronounced as Po-haa) is a classic Western Indian dish which can be served as snacks or breakfast. Thought traditionally made from just flattened rice, peanuts, onions and potatoes, I have always loved my mother's rendition packed with nutritious vegetables. It was her sneaky way of making us eat vegetables which we hated as kids. Over the years, poha became the eponymous symbol of homecoming for me; the first meal served as breakfast after I came home during the holidays. Nothing would compare to chowing down a hot plate of poha on a lazy holiday browsing through the newspaper.

Now some may argue this is not the "authentic" way of preparing it, but I like it. For me, it works as a wholesome breakfast, and the burst of colors from veggies early in the morning never fails to brighten my day.

Vegetable Poha

Inspired by Mom

Look for thick poha variety rather than thin. The thin variety soaks up too much water and disintegrates into a soggy mess.

Ingredients

(Serves 2 hungry adults)

Poha- 2 cups
Tomato chopped- 1 medium
Onion Chopped - 1/2 medium
Carrot- Diced - 1
Cabbage- finely sliced- 1 cup
Potatoes- Chopped- 1/3 cup
Frozen Peas/Freshly Shelled- 1/3 cup
Salt - To taste
Oil- 1-2 tablespoons

For tempering:
Oil - 1-2 tablespoon
Mustard Seeds: 1 teaspoon
Chilli powder- 1/2 teaspoon (Chopped thai green chillies can be used in its place)
Turmeric powder- 1/3rd teaspoon (Optional)

For garnishing:
Sprigs of cilantro/coriander
Lemon Juice- 2 tablespoons
Roasted peanuts- Coarsely chopped

Directions

In a fine-meshed sieve, place two cups of poha and run cold water over it and drain. All grains should be thoroughly soaked by water and there should not be any water left standing. The amount of water soaked varies wildly with the brand and quality of poha. Before mixing in with cooked vegetables at the last step, check it once. It should be soft and moist. If it appears too dry 15 minutes after the first soaking, sprinkle it with enough water to soak it again. However, don't over-do it, since excess water will result in its disintegration.

Heat a medium sized saute-pan or wok over medium-high heat. Once oil begins to shimmer, lower heat to medium. Immediately put mustard seeds in the hot oil, and allow it to pop. After most seeds have popped (1-2 minutes), put chilli powder and turmeric powder and stir for 1-2 minutes till fragrant. Don't allow the mixture to brown and adjust the heat if necessary. Remove from heat and reserve in another container.

I normally roast the peanuts in the same pan without oil over medium low heat, till they turn slightly brown. Chop them coarsely and reserve for garnishing. The chopping step can be omitted, but I like the way smaller bits just blend in with the rest and become surprising packages of flavor in the mouth.

Add remaining oil and chopped onions in the same pan and saute till the edges of the onions begin to brown. Add tomatoes, remaining vegetables, salt and reserved tempering from above. Mix well and cover the pan with the lid. Let the vegetables steam for about 15-20 minutes till they are cooked but still holding shape. Check occasionally to see if there is enough moisture from the vegetables. If not, add water 1-2 tablespoons at a time.

When cooked, turn off the heat and mix in the drained poha gently. The poha should be evenly mixed so that it takes on the yellow color from the turmeric. Garnish with lemon juice, cilantro and roasted peanuts.

Tuesday, January 11, 2011

Bulgur Salad with Roasted Tomato and Spinach: Starting anew


Amidst all the unpacking, house hunting, setting up a new life, and generally getting used to a different country has sent me on too many roller-coaster rides to count. Moving to a new country, despite living in our times, where the lines between different cultures are blurring, can still be a bit daunting. Then there have been some amazing experiences I have had since I arrived here. Therefore, I use the term "roller-coaster". And is it any surprise that most of the amazing ones have to do with my love for food? One of the delights I have discovered is the variety of ingredients and flavors available always. Though it can be quite a task to locate Indian goods, there is a whole world that beckons you the moment one enters the local super-store. Sometimes it can assume the proportions of a complicated project just to choose which new things to take home and experiment! Imagine getting home, poring over the internet to find a recipe to do justice to your ingredients, and realizing that you missed buying that one key ingredient! Very inconvenient wouldn't you say?

One of the great things I have come to love as a grown-up is salads. I can imagine many who read this shaking their heads in wonderment. Who doesn't like salads???!!! Well, to be honest, salads served in Indian households are nothing to boast about and are pretty simple affairs comprising of slices of raw cucumber, tomatoes, maybe an odd radish or two and a dressing of lemon juice and salt. And of course there are variations, but the underlying factor is that the flavor don't have the oomph to keep me interested day after day. So, there I was thumbing through my copy of "The Complete Italian Vegetarian Cookbook" by Jack Bishop, I was introduced to the subtle art of vinaigrettes or dressings. Traditionally defined as a fine emulsion of oil and vinegar blended with spices, it can transform a salad into something magnificent. A well balanced vinaigrette or a dressing can really help pop out those flavors in the raw veggies.

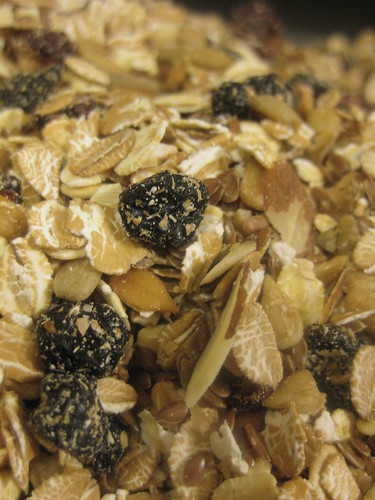
I have been experimenting with different forms of grains recently. Bulgur intrigued me since it was it is made from whole durum wheat, and does not require (or minimal) cooking! It is a close cousin to cracked wheat or "Dalia" as it is known in India. In contrast to cracked wheat, bulgur requires just a quick soak in hot water before its ready. The secret to quick cooking nature of bulgur is that it is parboiled. Parboiling before dehusking locks the precious nutrients in the hull of the wheat berries within the berry, that would have been otherwise lost. More information about bulgur can be read here.

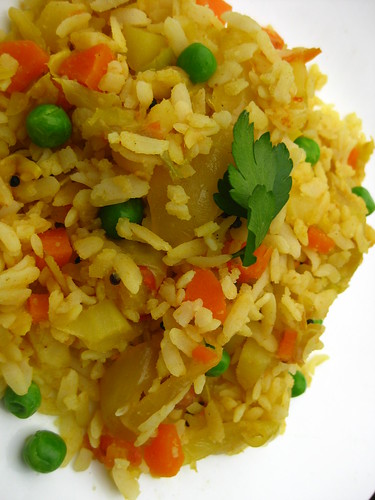
For the roasted tomato and spinach bulgur salad, I used a honey based dressing. A honey based dressing and the nutty flavors of bulgur are really match made in heaven. The honey tones play a starring role in this salad while the chick-peas and spinach add body to the entire dish. Of course, the reds, greens and the hues of brown look nothing short of confetti left from Christmas. An interesting side dish or a complete meal in itself, the salad is a great way to detox after weeks of holiday indulgences.

Roasted Tomato and Spinach Bulgur Salad

Inspired by A Year in Vegetarian Kitchen By Jack Bishop

I used slices of tomatoes here, but cherry tomatoes just look much better. I also used leftover cooked chickpeas which I had cooked from scratch a day earlier. Canned chickpeas drained to remove all liquid would work fine. Roasted cumin powder really rounds out the honey notes and it is highly recommended that you add it.

Ingredients

(Serves 2 hungry adults/ four adults as a side dish)

For the salad:

Bulgur- 1.5 cups
Spinach- Cut into ribbons- 1 cup
Roasted Cherry Tomatoes- 1 cup
Cooked chickpeas/1/3rd cup or Drained can chickpeas- 1/2 can

For roasting tomatoes:

Extra virgin olive oil - 1 tablespoon
Salt - 1/2 teaspoon
Freshly ground Pepper- To taste

For the dressing:

Extra virgin olive oil- 1/3rd cup
Honey- 2 tablespoons (or to taste)
Cumin powder- roasted - 1/2 teaspoon (or to taste)
Freshly ground Pepper- few rounds
Lemon Juice- 1 tablespoon

Directions

Preheat the oven at 375 F. For roasting tomatoes, in a oven safe wide dish or casserole, drizzle washed and dried cherry tomatoes with oil. Choose a dish which allows a little distance between tomatoes to allow roasting. If the dish is small and tomatoes overlap, they will steam rather than roast. Add salt and pepper to taste and toss to cover all tomatoes. Place the dish into the oven and roast for about 20-25 minutes till the outer skins of tomatoes shrivel and liquids released around tomatoes begin to char. Remove from the oven and cool. You can remove the skins from the roasted tomatoes after they cool down to let them remain.

Whisk all ingredients listed for the dressing in a cup till smooth emulsion like consistency is achieved and keep aside. This may take a little longer because of the sticky nature of honey. Adjust to taste if necessary.

For cooking bulgur, bring 3 cups of water to a rolling boil. In a large bowl, pour boiling water over bulgur and keep it aside for 15-20 minutes until soft. Use a large bowl since bulgur expands after absorbing water. Drain off excess water and gently squeeze out more water from the soaked bulgur. This step is crucial since the salad will become soggy if excess water remains.

Toss bulgur, chickpeas, spinach, tomatoes and the dressing and enjoy! The salad should be served immediately as the spinach will get soggy from the dressing if kept sitting for long. For best results, add dressing in the end just before serving.

Pages